This guide shows how to reduce false alarms in video analytics without creating blind spots, so you get fewer alerts—but better outcomes.
What Counts as a “False Alarm” in Video Analytics?
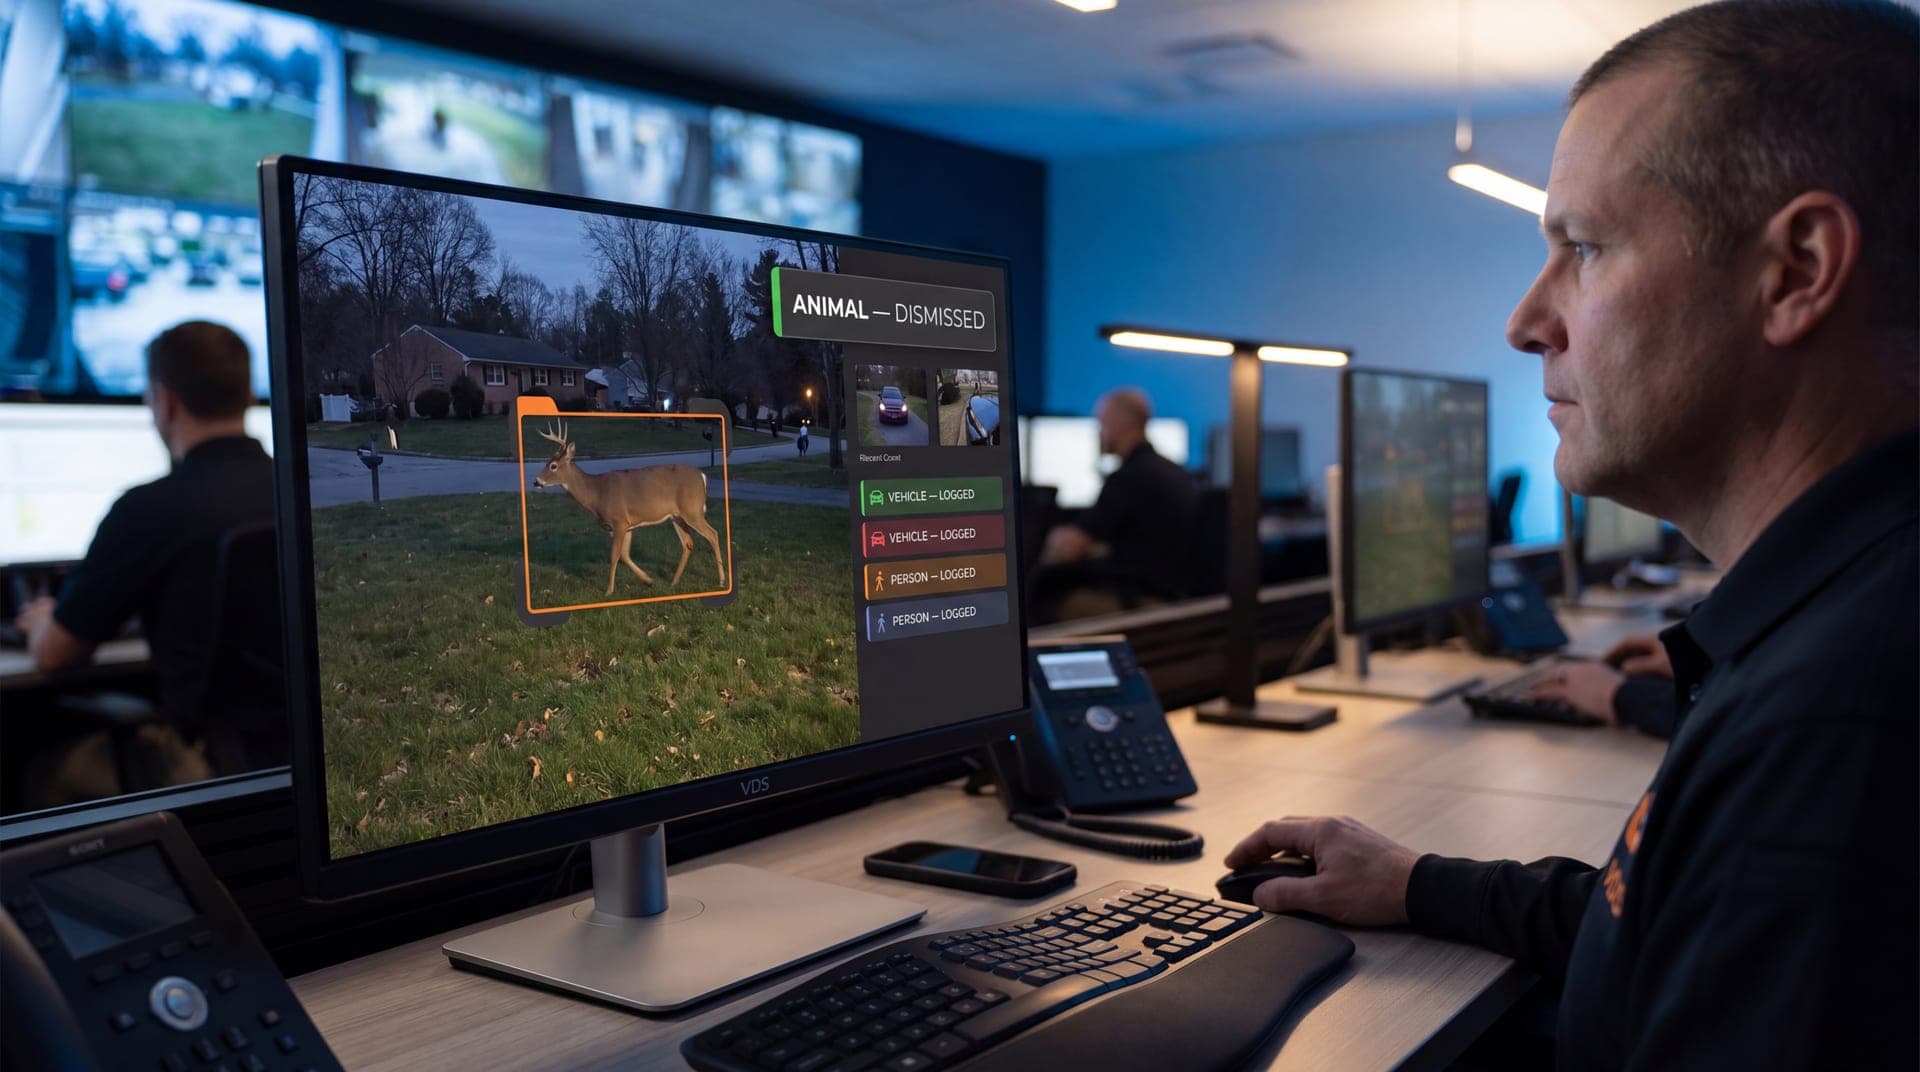
A security camera false alarm is any alert that triggers a response but doesn’t represent a security issue. That includes:
Headlights sweeping a lot
Rain, snow, fog, or insects near the lens
Shadows and sun glare shifts
Busy pedestrian or vehicle traffic in the wrong zone
Forklifts or trucks triggering rules meant for people
Staff activity during normal operating hours
The goal isn’t “zero alerts.” The goal is high-confidence alerts that match your actual risk windows and response capacity.
Why False Alarms Happen: 5 Most Common Causes
Most nuisance alerts come from predictable problems:
Zones are too big (the camera sees everything, so everything triggers)
Schedules don’t match real site behavior (deliveries, shift changes, cleaning crews)
Rules are too generic (motion-only, no object classification)
The camera view includes problem sources (roads, trees, reflective surfaces, signage)
There’s no verification step before escalation
If your analytics isn’t tied to a workflow, you don’t have “security alerts.” You have noise.
Step 1: Fix Motion Zones the Right Way
Most false alarms are caused by lazy zone setup. “Cover the whole frame” feels safe, but it creates nonstop triggers.
Build zones around approach, action, and exit
Design zones to capture how incidents actually happen:
Approach: Where someone enters the risk area
Action: Where the theft, damage, or breach occurs
Exit: Where they leave (drive lane, gate, walkway)
This reduces random triggers while preserving usable evidence.
Exclude the usual offenders
Trim zones to avoid:
Roads and sidewalks outside your property line
Trees, flags, tall grass, and moving signage
Areas where headlights sweep at night
Water reflections, glossy walls, and glass storefront glare
If the camera sees it, the zone will trigger on it.
Use multiple small zones instead of one big zone
Smaller zones = cleaner triggers.
One big zone creates “always motion”
Several tight zones let you define “where motion matters”
This is especially important for lots and perimeters.
If you’re building parking lot zones, pair this with a parking lot surveillance camera coverage approach so you’re not “detecting motion” in areas you can’t actually identify.
Step 2: Use Schedules (Most Teams Forget This)
If your analytics runs 24/7 with the same rules, you’ll always have noise. Most sites have predictable patterns that should change alerting behavior.
Match schedules to real operations
Set different rules for:
Business hours vs after-hours
Delivery windows
Shift change periods
Weekend vs weekday behavior
Seasonal darkness changes
Example: A retail site might allow pedestrian traffic in specific zones until close, then switch to “person detection and loitering” after-hours.
Use “quiet hours” logic for real risk windows
Most incidents happen when:
Fewer employees are present
Visibility is lower
Access control is weaker
Response times are slower
If your goal is outcomes, align alerting to the times you actually need response—then pair it with remote video monitoring so someone verifies what’s happening before escalation.
Step 3: Tighten Rules
Motion-only alerts are the loudest alerts. The best systems use rules that reflect intent.
Use person/vehicle rules instead of “motion”
When possible, choose:
Person detection for doors, gates, and fenced perimeters
Vehicle detection for drive lanes, lot entrances, loading zones
Then exclude:
Animals (when supported)
Staff-only paths during normal hours
This alone can cut nuisance alerts drastically.
Loitering rules reduce “walk-through” noise
Loitering is powerful because it targets intent:
A person walking past shouldn’t trigger escalation
A person lingering near vehicles, gates, or equipment should
Good loitering settings usually include:
A defined loiter zone (tight and specific)
A time threshold (long enough to avoid passersby)
After-hours scheduling (loitering during business hours may be normal)
Direction-of-travel rules prevent backward triggers
Use direction logic when you have clear traffic flow:
Vehicle entry vs exit lanes
One-way drive lanes
Restricted gate approaches
This prevents triggers from normal movement patterns that aren’t risky.
Step 4: Reduce Environment-Driven Triggers
Your camera environment matters as much as your analytics settings.
Night glare and headlights are a top false alarm source
To reduce headlight washout triggers:
Avoid aiming directly into traffic lanes
Adjust angles to reduce direct glare
Use tighter zones away from reflective surfaces
Rain, snow, and insects are predictable offenders
Practical ways to reduce them:
Keep the lens clean and housing sealed
Avoid placing zones near IR reflection points
Reduce zones at the extreme edges of the frame where noise is highest
If your system isn’t performing at night, review and maintain the cameras consistently using a routine like video surveillance camera maintenance.
Step 5: Add Verification Before Escalation
The best way to reduce wasted dispatches is simple: verify first.
A strong workflow looks like:
Alert triggers
Operator verifies what’s happening on video
Escalate only when the event is real (site rules define what “real” means)
Document the event with time, clip export, and notes
This is where professional remote security video monitoring changes outcomes—because the alert turns into action instead of chaos.
Quick Fix Checklist: Cut False Alarms in 30 Minutes
If you need fast improvement, start here:
Shrink motion zones to only the high-risk area
Exclude roads, trees, flags, reflective walls, and glass glare
Replace motion alerts with person/vehicle detection where available
Add a schedule so after-hours rules are stricter than business hours
Add loitering thresholds for “intent-based” alerts
Confirm camera angles reduce headlight washout at night
Test 3 days of alerts and adjust one variable at a time
Make changes slowly. If you change everything at once, you won’t know what fixed the noise.
Where False Alarm Reduction Matters Most
These environments tend to have the worst nuisance alert problems—and the biggest payoff when fixed:
Parking lots and garages with headlights and constant movement
Construction sites with changing layouts and after-hours risk
Logistics yards with forklifts, trucks, and restricted zones
Retail and shopping centers with mixed pedestrian and vehicle traffic
Perimeters exposed to weather and lighting variability
How to Reduce False Alarms in Video Analytics and Get Reliable After-Hours Alerts
If your team is overwhelmed by nuisance alerts, the solution isn’t turning analytics off—it’s tuning mot